Configure Amaspace in Shopify
On this page
On this page you’ll find a short setup guide: from first connection to placing the configurator on your store pages. Each step is illustrated with a screenshot.
If you haven’t installed the app yet, you can do it here: https://apps.shopify.com/amaspace
Step 1 — Connect your Shopify store to Amaspace
After installing the app you will be automatically redirected to the Amaspace platform.
If your Shopify store is already connected, you’ll go straight to your Amaspace dashboard.
If not, you’ll see an “Access error (403)” card with two buttons:
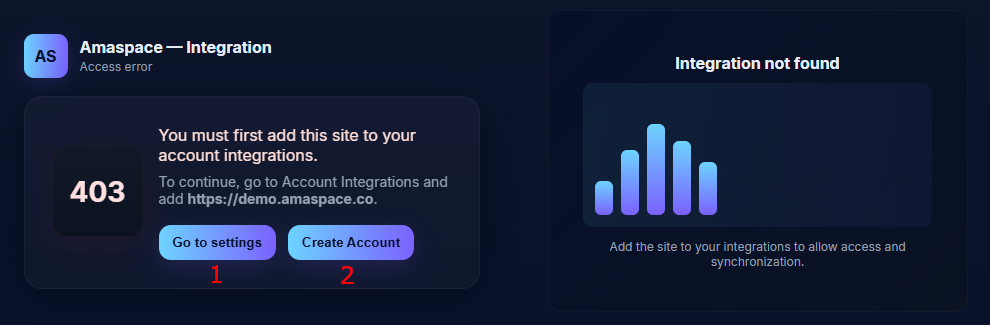
- Create Account – if you’re new to Amaspace
- A new Amaspace account is created automatically using your Shopify details.
- Your Shopify store is added to Account Integrations and linked to this account.
- Go to settings – if you already have an Amaspace account but no integration
- You’ll be redirected to Account Integrations: https://app.amaspace.co/integrations.
- Add this Shopify store to your integrations and save.
Step 2 — Choose your pricing plan
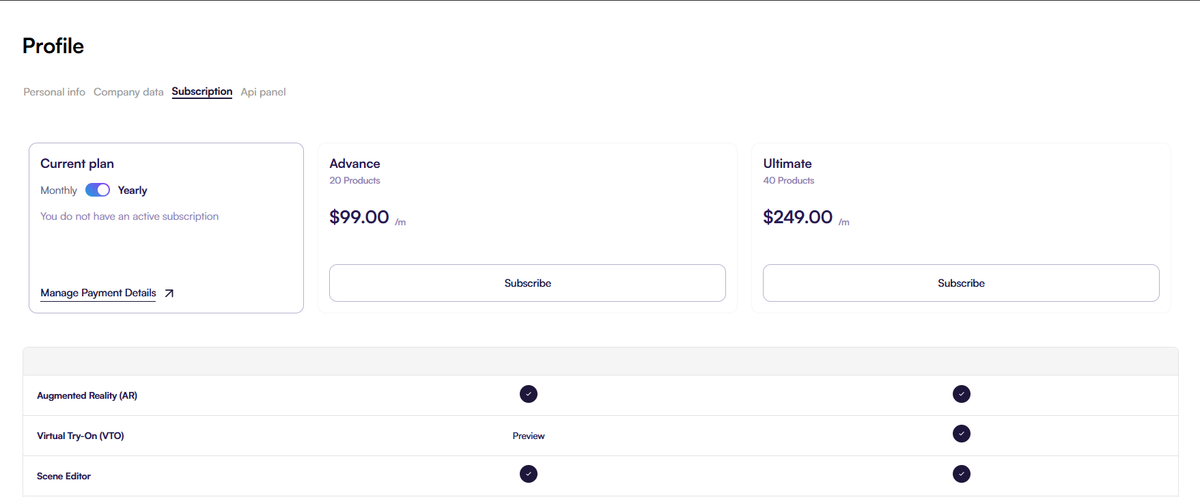
- After connecting, you’ll be redirected to the pricing plans page.
- Review the features in each plan and choose the one that fits your needs.
- Confirm the plan to unlock Amaspace features.
Step 3 — Create a product in Amaspace
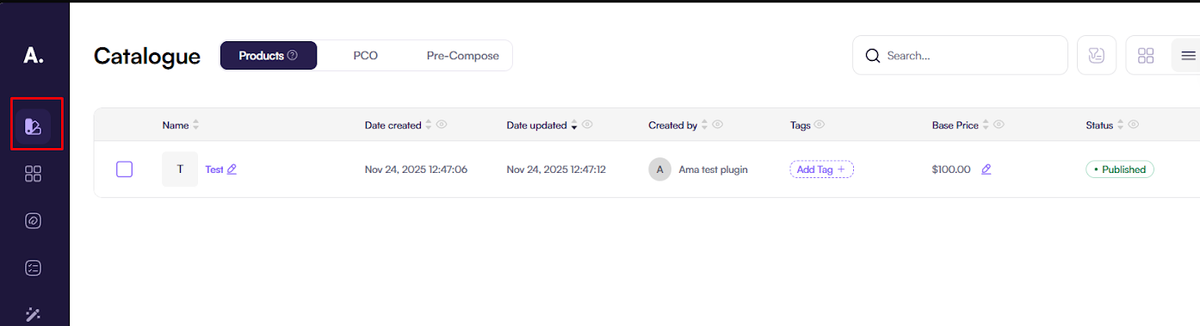
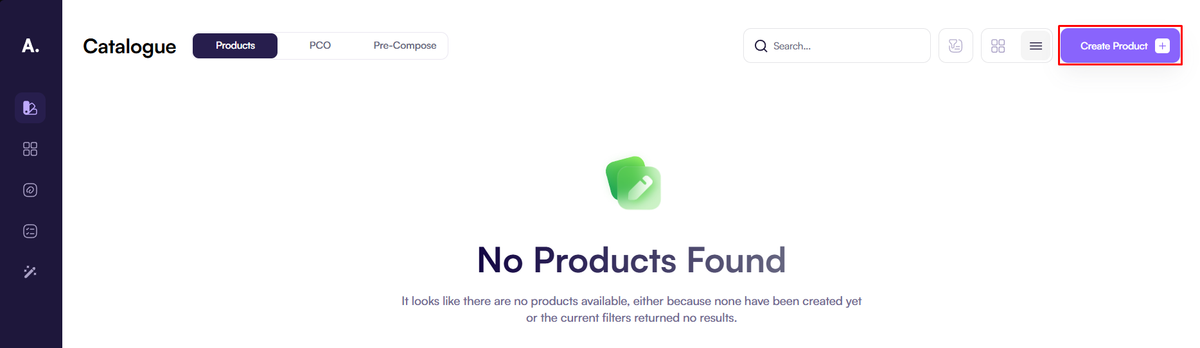
- Go to the product catalog: https://app.amaspace.co/catalog
2. Click Create product.
3. Choose how you want to add a 3D model:
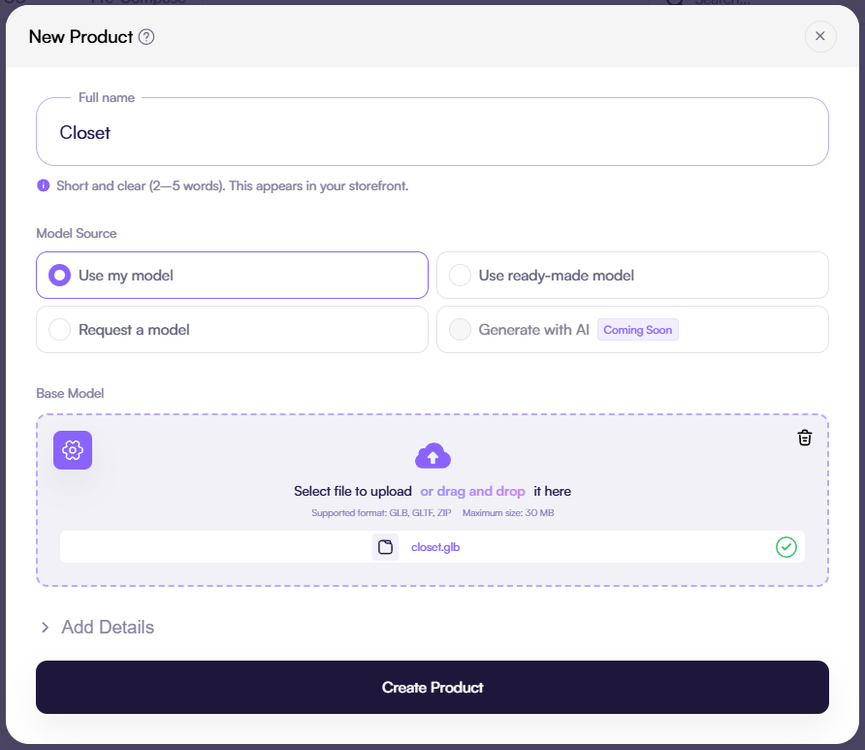
- upload your own 3D model - Use my model,
- use a model from our product library - Use ready-model,
- or request a custom 3D model from our team - Request a model.
4. Fill "Full name" product field and "Details" (optional) and save.
5. For advanced configuration (options, materials, rules, animations), see our detailed 3D configuration guide
Step 4 — (Optional, recommended) Link your Amaspace product to a Shopify product
This step lets the configurator:
- appear automatically on a specific Shopify product page,
- save each configuration as a variant of that product (instead of creating a new product every time).
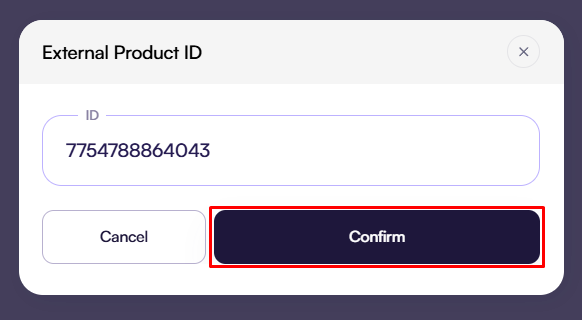
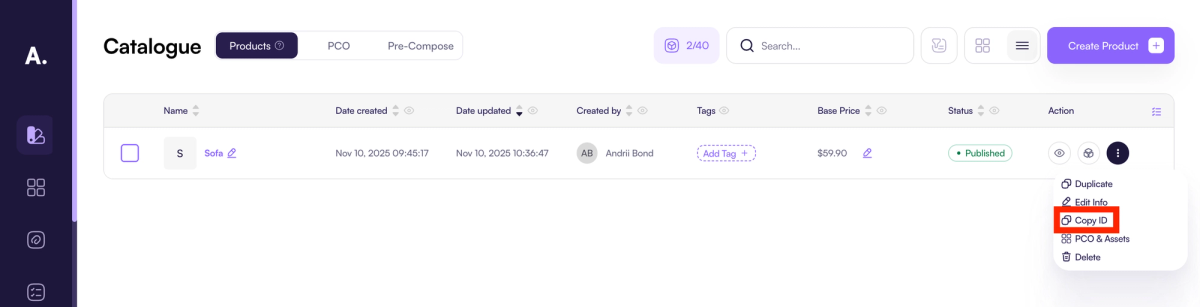
1. In Shopify admin, open Products → [your product] and copy the product ID from the URL.
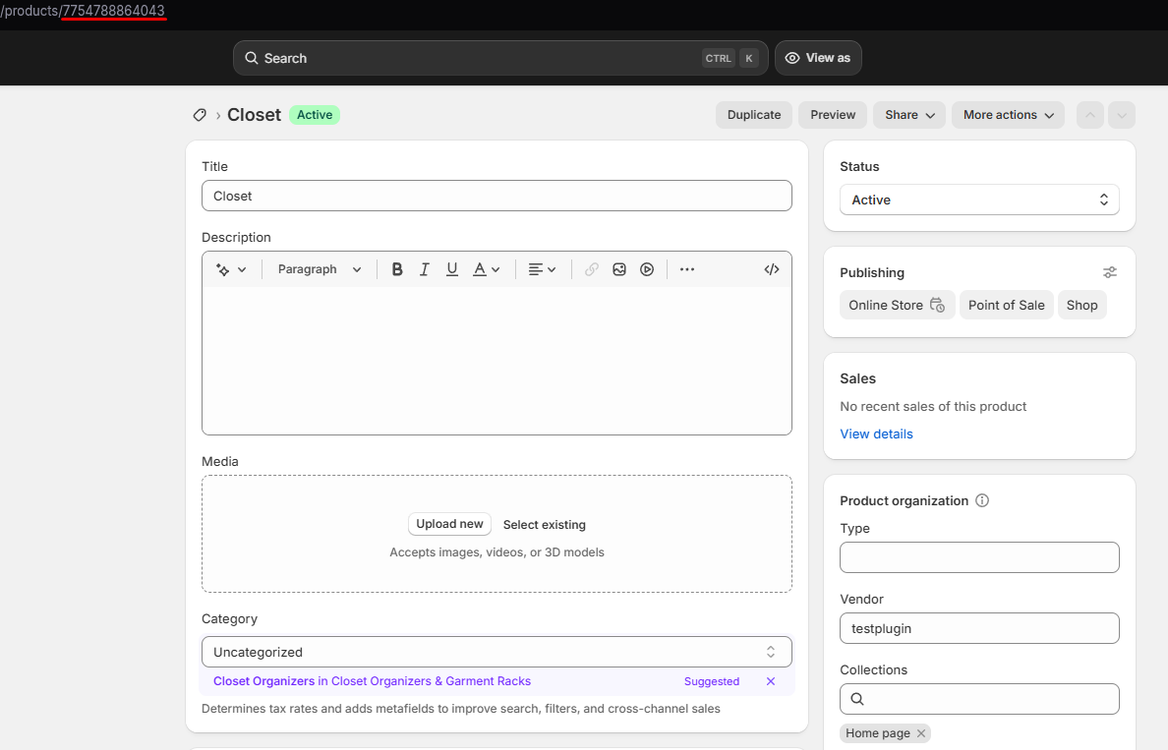
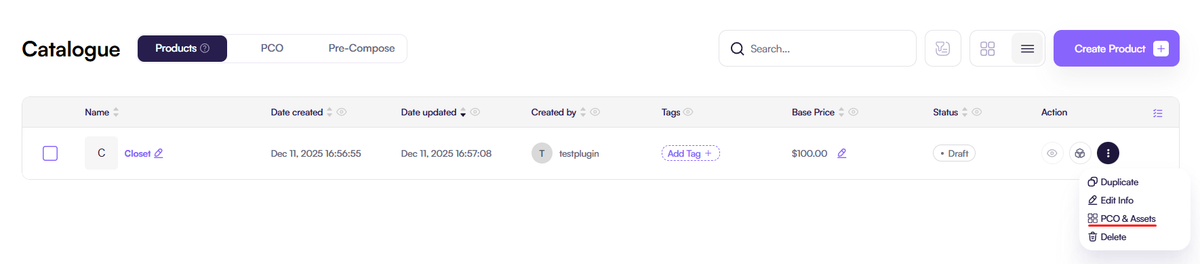
2. In Amaspace, go to https://app.amaspace.co/catalog, open the product and switch to PCO & Assets.
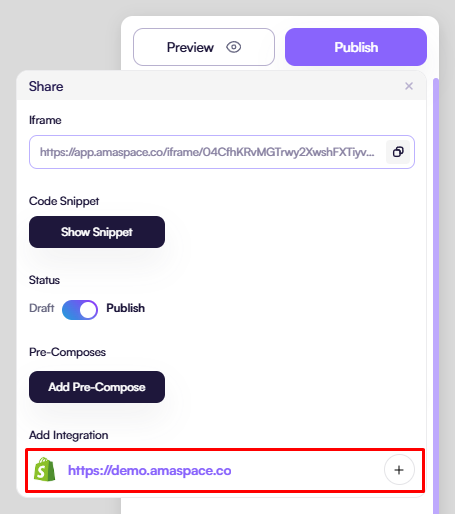
3. Click Publish → Shopify integration and paste the Shopify product ID, then save.
Step 5 — Add the configurator to your Shopify theme
5.1. Open https://app.amaspace.co/integrations and copy your Secret API Key

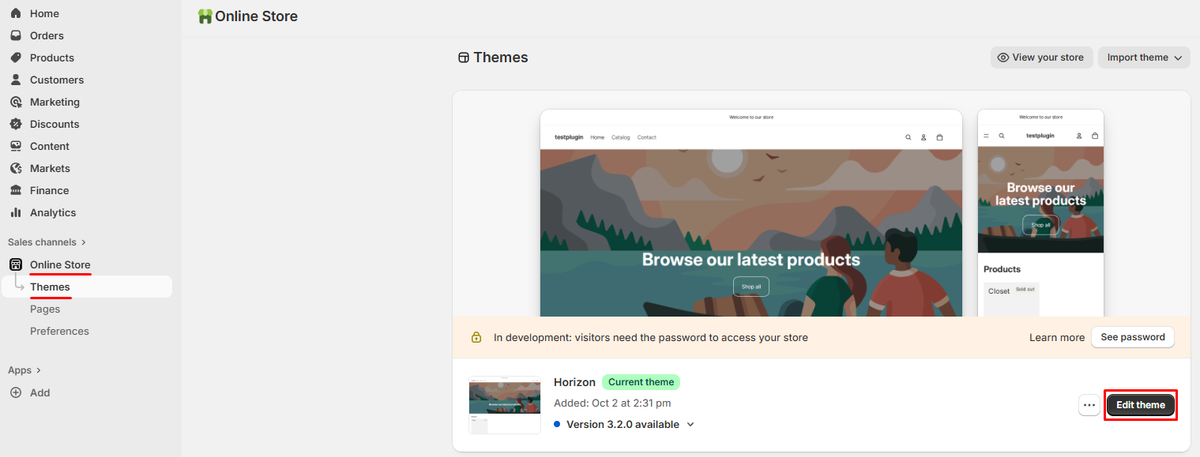
5.2. In Shopify admin go to Online Store → Themes → Customize.
5.3. Product Customizer on a product page (recommended)
1. Open your Product template.
2. Click Add section → Apps → Product Page Customizer.

3. In the block settings, paste your Secret API Key / Ama Token.
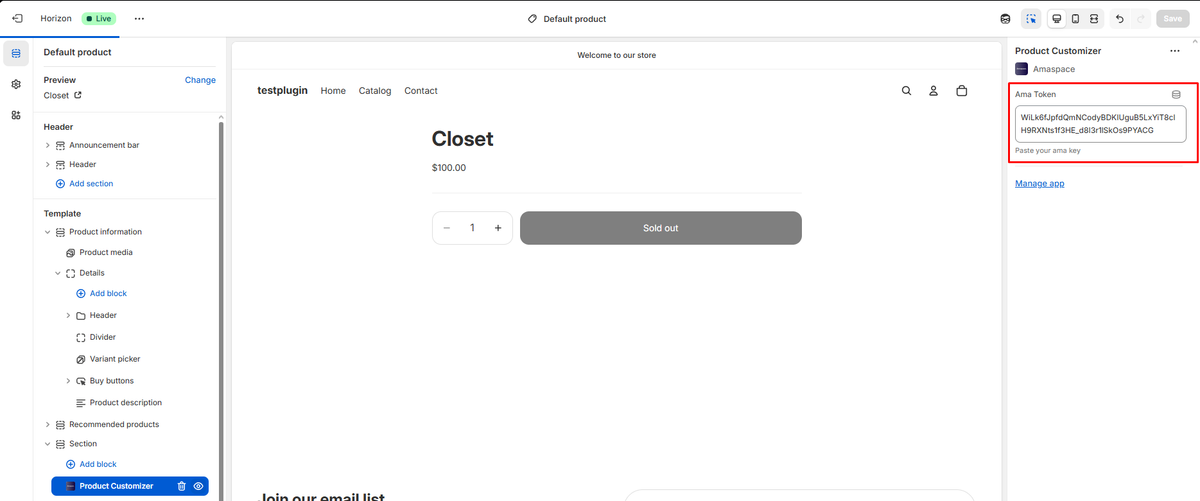
4. Click Save.
If the product is linked as in Step 4, the correct configurator will appear on this product page and each configuration will be stored as a variant.
5.4. Page Customizer on any page
1. In the theme editor, open the page template where you want the configurator (home, landing, custom page, product, etc.).
2. Click Add section → Apps → Page Customizer.
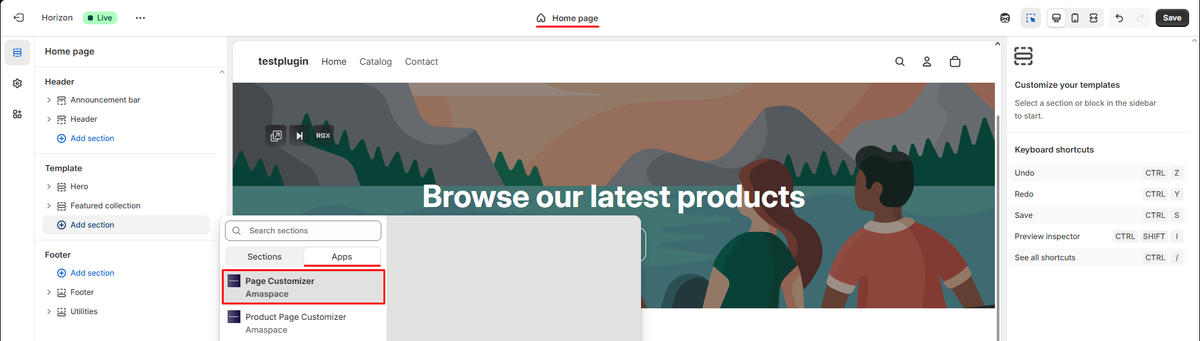
3. Paste your Secret API Key / Ama Token into the settings.

4. In Product for customization, paste the Product ID from Amaspace (https://app.amaspace.co/catalog).
5. Paste your Amaspace Product ID into the settings.
6. If you leave this field empty, the first published product in your Amaspace catalog will be shown by default.
7. Click Save.
Step 6 — Your configurator is live 🎉
Your Amaspace configurator is now connected and visible in your Shopify store.
You May Also Like
Boat Configurator End-to-end Guide
Step-by-step guide to building a boat configurator in Amaspace. Learn how to create attributes, apply colors, link assets, adjust 3D scene settings, generate branded PDF quotes, and use fully functional AR on mobile.
Augmented Reality: Enable and Customize AR
Learn how to activate native AR for your 3D product customizer. Amaspace makes it easy - no app required. iOS and Android supported via WebXR.
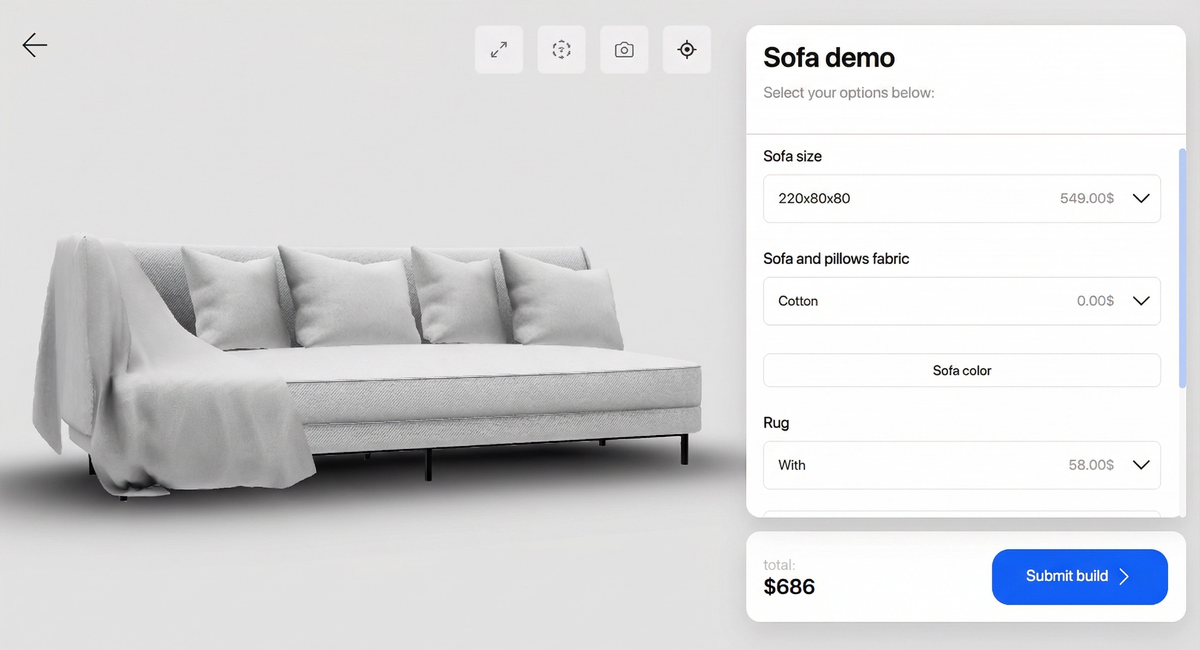
Build Your First Sofa Customizer
Learn how to create an interactive 3D sofa configurator with multiple materials and textures. Step-by-step guide using Amaspace, no code required.